tenco_swing : 프로젝트 만들기
src 폴더에 ch01 패키지 만들기
기본설정
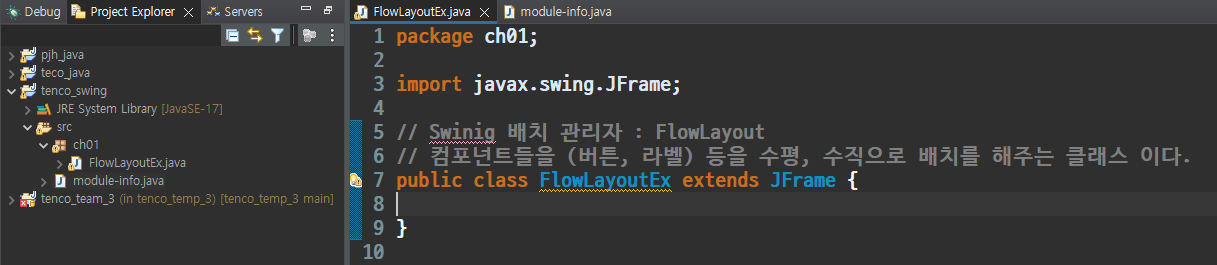
package ch01;
import java.awt.FlowLayout;
import javax.swing.JButton;
import javax.swing.JFrame;
// Swinig 배치 관리자 : FlowLayout
// 컴포넌트들을 (버튼, 라벨) 등을 수평, 수직으로 배치를 해주는 클래스 이다.
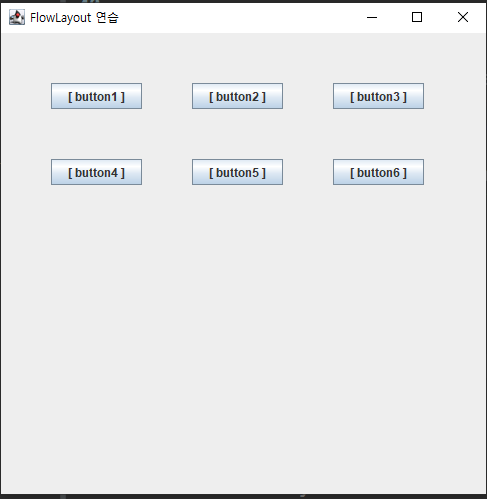
public class FlowLayoutEx2 extends JFrame {
// 배열 활용 - 하나의 변수로 여러개 통으로 관리하고 싶다면 배열을 써보자.
private JButton button[];
// 생성자
public FlowLayoutEx2() {
super.setTitle("FlowLayout 연습");
super.setSize(500, 500); // 프레임 사이즈
super.setVisible(true); // 프레임 보이게 한다.
super.setDefaultCloseOperation(JFrame.EXIT_ON_CLOSE);
// 생성자에서 메서드 호출 가능하다.
initData();
setInitLayout();
}
// 멤버 변수를 초기화 하는 기능 (값을 넣다.)
public void initData() {
// 반복문 활용
button = new JButton[6]; // 공간만 선언 [][][][][][]
// 0 1 2 3 4 5
for (int i = 0; i < button.length; i++) {
button[i] = new JButton("[ button" + (i+1) + " ]");
}
}
// 컴포넌트들을 배치하는 기능
public void setInitLayout() {
// 배치 관리자 --> BorderLayout 이라는 배치관리자가 기본으로 활용 된다.
// FlowLayout flowLayout = new FlowLayout();
// super.setLayout(flowLayout); // 배치관리자 --> FlowLayout
// 배치 관리자 생성 및 JFrame 셋팅
super.setLayout(new FlowLayout(FlowLayout.LEADING, 50, 50));
// 컴포넌트를 붙이다.
// 반복문 활용
for (int i = 0; i < button.length; i++) {
super.add(button[i]);
}
}
// 코드 테스트
public static void main(String[] args) {
// FlowLayoutEx f1 = new FlowLayoutEx(); // <-- 부를 수 있는 상태
new FlowLayoutEx2(); // <--- 주소값, 참조값이 없기에 '익명 클래스' 이다.
// 다시 접근해서 사용할 일 없으면 new 라고 선언만 해도 된다.
} // end of main
}
package ch01;

// 단축키
//Ctrl + shift + o;
// Ctrl + shift + s;
// ctrl + shift + f;
import java.awt.BorderLayout;

import javax.swing.JButton;
import javax.swing.JFrame;

public class BorderLayout1 extends JFrame {

	// 생성자
	public BorderLayout1() {

		initData();
		setInitLayout();

	}

	public void initData() {
		setTitle("borderLayout 연습");
		setSize(600, 600);
		setVisible(true);
		setDefaultCloseOperation(JFrame.EXIT_ON_CLOSE); // 끄면 프로그램 종료 해

	}

	public void setInitLayout() {
		// 배치 관리자 선정 (컨테이너)
		// BorderLayout -- 컴포넌트들을 동,서,남,북,가운데 로 배치 시켜주는 레이아웃이다.
		setLayout(new BorderLayout());
		add(new JButton("동"), BorderLayout.EAST);
		add(new JButton("서"), BorderLayout.WEST);
		add(new JButton("남"), BorderLayout.SOUTH);
		add(new JButton("북"), BorderLayout.NORTH);
		add(new JButton("센터"), BorderLayout.CENTER);
	}

	// 코드 테스트
	public static void main(String[] args) {
		new BorderLayout1(); // <--- 주소값, 참조값이 없기에 '익명 클래스' 이다.
		// 다시 접근해서 사용할 일 없으면 new 라고 선언만 해도 된다.
	} // end of main

}
package ch01;

//Ctrl + shift + o;
// Ctrl + shift + s;
// ctrl + shift + f;

import java.awt.BorderLayout;

import javax.swing.JButton;
import javax.swing.JFrame;

public class BorderLayout2 extends JFrame {

	final int WIDTH = 600;
	final int HEIGHT = 600;

	JButton[] buttons;
	String[] directions = { BorderLayout.EAST, BorderLayout.WEST, BorderLayout.NORTH, BorderLayout.SOUTH,
			BorderLayout.CENTER };

	// Ctrl + shift + o;

	// 생성자
	public BorderLayout2() {

		initData();
		setInitLayout();

	}

	public void initData() {
		setTitle("borderLayout 연습");
		setSize(WIDTH, HEIGHT);
		setVisible(true);
		setDefaultCloseOperation(JFrame.EXIT_ON_CLOSE); // 끄면 프로그램 종료 해
	}

	public void setInitLayout() {
		// 배치 관리자 선정 (컨테이너)
		// BorderLayout -- 컴포넌트들을 동,서,남,북,가운데 로 배치 시켜주는 레이아웃이다.
		setLayout(new BorderLayout());

		// 반복문을 활용해서 코드를 완성하세요.
		buttons = new JButton[directions.length];
		for (int i = 0; i < buttons.length; i++) {
			add(buttons[i] = new JButton(directions[i]), directions[i]);

		}
	}

	// 코드 테스트
	public static void main(String[] args) {
		new BorderLayout2(); // <--- 주소값, 참조값이 없기에 '익명 클래스' 이다.
		// 다시 접근해서 사용할 일 없으면 new 라고 선언만 해도 된다.
	} // end of main

}

'Java' 카테고리의 다른 글
| 다형성 (Polymorphism) 업캐스팅, 다운캐스팅, 인터페이스 (0) | 2024.04.25 |
|---|---|
| 2024.04.25 JAVA 유용한 클래스 - Object 클래스 (0) | 2024.04.25 |
| 2024.04.25 인터페이스에 대한 고찰 (0) | 2024.04.25 |
| 2024.04.25 인터페이스(interface) (0) | 2024.04.25 |
| 2024.04.24 추상 클래스(abstract class) (0) | 2024.04.24 |